
CSS: Paddings
Looking at the various blocks that we've created during our lessons, you'll notice that the text "sticks" to the edges of the blocks. For example:
<div class="card card-tight">A card with white text on a purple background</div>.card {
color: #ffffff;
background-color: #673ab7;
}
.card-tight {
padding: 0;
}
You might say that that's not how the examples usually look in the lessons themselves, and you'd be right. In each example, internal indents from the block edges called margins were used to add a little spacing.
Four rules are used to create internal indents:
padding-toppadding-rightpadding-bottompadding-left
Each property takes a numeric value and a unit of measurement, e.g. pixels
<div class="card">A card with white text on a purple background</div>.card {
padding-top: 10px;
padding-bottom: 10px;
padding-left: 20px;
color: #ffffff;
background-color: #673ab7;
}
Shortened property
If you want to set indents on all sides, don't use 4 different properties, you only need one - padding. This is shorthand for some properties we already know which allows you to set them in the following order:
- top
- right
- bottom
- left
The order in which it is specified is important and corresponds to the order specified above. If you rework the example above, it will look like this:
.card {
  padding: 10px 0 10px 20px

  color: #ffffff;
  background-color: #673ab7;
}In addition to this notation, there are shorthand notations of these rules for convenience:
- If you specify only one value, it will be used simultaneously for all sides
- If you specify two values, the first will be used for vertical (top and bottom) margin and the second for horizontal (right and left) margin
- If you specify three values, they will be used for top, horizontal and bottom margin
Instructions
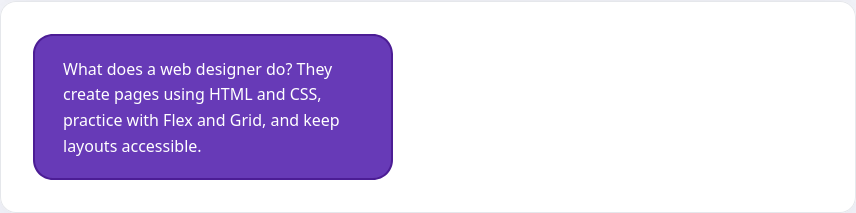
Add a paragraph to the editor with the class set to padding and set internal indents:
- 10 pixels at the top
- 15 pixels at the bottom
- 20 pixels left and right
Use the following text for the paragraph:
What does a web designer do? They create pages using HTML and CSS. They can use the capabilities of Flex and Grid modules. They use the SASS preprocessor and the Pug templating engine, and builds projects with Gulp. They keep track of site accessibility by creating semantically correct markup. They create components and utilities on Bootstrap. They lay out adaptive projects.
The text itself does not matter and won't be checked. The main purpose is to add text to be arranged in multiple lines. This will help you see the left and right indents correctly.
Add a black background to the paragraph and white text. Try different values for the padding property to see how it affects the block.
Write the styles in the <style> tag
If you've reached a deadlock it's time to ask your question in the «Discussions». How ask a question correctly:
- Be sure to attach the test output, without it it's almost impossible to figure out what went wrong, even if you show your code. It's complicated for developers to execute code in their heads, but having a mistake before their eyes most probably will be helpful.
CSS: Paddings
Looking at the various blocks that we've created during our lessons, you'll notice that the text "sticks" to the edges of the blocks. For example:
<div class="card card-tight">A card with white text on a purple background</div>.card {
color: #ffffff;
background-color: #673ab7;
}
.card-tight {
padding: 0;
}
You might say that that's not how the examples usually look in the lessons themselves, and you'd be right. In each example, internal indents from the block edges called margins were used to add a little spacing.
Four rules are used to create internal indents:
padding-toppadding-rightpadding-bottompadding-left
Each property takes a numeric value and a unit of measurement, e.g. pixels
<div class="card">A card with white text on a purple background</div>.card {
padding-top: 10px;
padding-bottom: 10px;
padding-left: 20px;
color: #ffffff;
background-color: #673ab7;
}
Shortened property
If you want to set indents on all sides, don't use 4 different properties, you only need one - padding. This is shorthand for some properties we already know which allows you to set them in the following order:
- top
- right
- bottom
- left
The order in which it is specified is important and corresponds to the order specified above. If you rework the example above, it will look like this:
.card {
  padding: 10px 0 10px 20px

  color: #ffffff;
  background-color: #673ab7;
}In addition to this notation, there are shorthand notations of these rules for convenience:
- If you specify only one value, it will be used simultaneously for all sides
- If you specify two values, the first will be used for vertical (top and bottom) margin and the second for horizontal (right and left) margin
- If you specify three values, they will be used for top, horizontal and bottom margin
Instructions
Add a paragraph to the editor with the class set to padding and set internal indents:
- 10 pixels at the top
- 15 pixels at the bottom
- 20 pixels left and right
Use the following text for the paragraph:
What does a web designer do? They create pages using HTML and CSS. They can use the capabilities of Flex and Grid modules. They use the SASS preprocessor and the Pug templating engine, and builds projects with Gulp. They keep track of site accessibility by creating semantically correct markup. They create components and utilities on Bootstrap. They lay out adaptive projects.
The text itself does not matter and won't be checked. The main purpose is to add text to be arranged in multiple lines. This will help you see the left and right indents correctly.
Add a black background to the paragraph and white text. Try different values for the padding property to see how it affects the block.
Write the styles in the <style> tag
If you've reached a deadlock it's time to ask your question in the «Discussions». How ask a question correctly:
- Be sure to attach the test output, without it it's almost impossible to figure out what went wrong, even if you show your code. It's complicated for developers to execute code in their heads, but having a mistake before their eyes most probably will be helpful.
Your exercise will be checked with these tests:
const { test } = require('tests');

test(({ query, expect }) => {
  const element = query(document, '.padding');

  const style = getComputedStyle(element);
  expect(style).to.have.property('padding-top', '10px');
  expect(style).to.have.property('padding-bottom', '15px');
  expect(style).to.have.property('padding-left', '20px');
  expect(style).to.have.property('padding-right', '20px');
});Teacher's solution will be available in:
20:00
