HTML: Tag nesting
Tag nesting is an important concept in HTML. You can place more than just text between HTML tags as it was before, you can also place other tags. This allows you to create a complex layout in which areas are separated from each other, e.g., the menu is separated from the header, the advertising block is separated from the main content, etc.
Some elements in HTML require some tags to be nested into other. For example, lists:
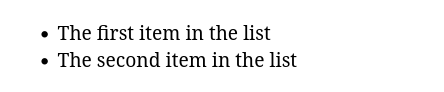
<ul class="m-0">
    <li>The first item in the list</li>
    <li>The second item in the list</li>
</ul>The <ul> tag is used to define the list, and this one indicates that it's a bulleted list. Inside are the <li> tags that define the elements of our list.
This kind of nesting resembles a tree, there's a treetop (the <ul> tag) and leaves (the <li> tags)
|──ul
| |──li
| |──liInterestingly a tag with other tags inside is also called a wrapper
The tree can grow even further. The lessons about lists will show you that other lists can be placed inside list elements, and then lists can be placed inside those lists, and so on and so forth.
But there are exceptions. You can't put paragraphs within paragraphs in HTML. The example below would be incorrect:
<p>Paragraph
  <p>And here's another paragraph within a paragraph</p>.
  This is not a happy home for the paragraph.
</p>In this lesson, we introduced the concept of nesting tags in HTML and examined it with the aid of bullet lists as a reminder. During this course, you'll learn both about the many situations where nesting is the best solution, and also about the tags that must not be nested within each other.
Instructions
Create a bullet list of three items. You learned about this type of list in this lesson
If you've reached a deadlock it's time to ask your question in the «Discussions». How ask a question correctly:
- Be sure to attach the test output, without it it's almost impossible to figure out what went wrong, even if you show your code. It's complicated for developers to execute code in their heads, but having a mistake before their eyes most probably will be helpful.
HTML: Tag nesting
Tag nesting is an important concept in HTML. You can place more than just text between HTML tags as it was before, you can also place other tags. This allows you to create a complex layout in which areas are separated from each other, e.g., the menu is separated from the header, the advertising block is separated from the main content, etc.
Some elements in HTML require some tags to be nested into other. For example, lists:
<ul class="m-0">
    <li>The first item in the list</li>
    <li>The second item in the list</li>
</ul>The <ul> tag is used to define the list, and this one indicates that it's a bulleted list. Inside are the <li> tags that define the elements of our list.
This kind of nesting resembles a tree, there's a treetop (the <ul> tag) and leaves (the <li> tags)
|──ul
| |──li
| |──liInterestingly a tag with other tags inside is also called a wrapper
The tree can grow even further. The lessons about lists will show you that other lists can be placed inside list elements, and then lists can be placed inside those lists, and so on and so forth.
But there are exceptions. You can't put paragraphs within paragraphs in HTML. The example below would be incorrect:
<p>Paragraph
  <p>And here's another paragraph within a paragraph</p>.
  This is not a happy home for the paragraph.
</p>In this lesson, we introduced the concept of nesting tags in HTML and examined it with the aid of bullet lists as a reminder. During this course, you'll learn both about the many situations where nesting is the best solution, and also about the tags that must not be nested within each other.
Instructions
Create a bullet list of three items. You learned about this type of list in this lesson
If you've reached a deadlock it's time to ask your question in the «Discussions». How ask a question correctly:
- Be sure to attach the test output, without it it's almost impossible to figure out what went wrong, even if you show your code. It's complicated for developers to execute code in their heads, but having a mistake before their eyes most probably will be helpful.
Your exercise will be checked with these tests:
const { test } = require('tests');

test(({ query, querySelectorAll, expect }) => {
  query(document, 'ul', HTMLUListElement);
  const elements = querySelectorAll(document, 'ul > li', HTMLLIElement);
  expect(elements).to.have.length(3);
});Teacher's solution will be available in:
20:00
